


Replacing the cabinets in your kitchen is a costly endeavor. If you would love a new look for your kitchen, but the cost of replacing the cabinets is holding you back, there is an alternative that is far more cost effective. You don’t have to replace them, try refinishing them for a whole new look that is easier on your wallet.
We outlined in a previous post the importance of the kitchen to the home. It is typically the central meeting point of all family members where discussions, laughter, and even some cooking happens! Perhaps this is why a kitchen remodel is so popular and valued as such by prospective home buyers.
If you are looking for information on how to decide whether to restore vs replace, paint vs stain, or latex vs oil-based paint your existing cabinets, that post is a great place to start. In this article, we are going to discuss the common obstacles faced when restoring cabinets, whether you are a DIY master or a professional painter.
To determine what level of preparation is needed, first you must decide what you want the outcome to be. Some questions to consider:
Once you know the answer to these primary questions, you will be ready to start your project.
If you open up a can of paint or stain, expect it to end up somewhere it shouldn’t, so plan accordingly. As the kitchen is likely the focal point of your house, ideally as little work is performed there as possible. To properly prepare for painting your cabinet “doors and drawers”, first remove them from the cabinets, then remove the handles and the hinges. Store your hardware in a ziplock so nothing gets lost.
Once this is done, you can relocate the doors and drawers to a garage or unfinished basement which makes an ideal location for your project. Prior to doing so, put down paper or plastic to protect the floor and/or walls.
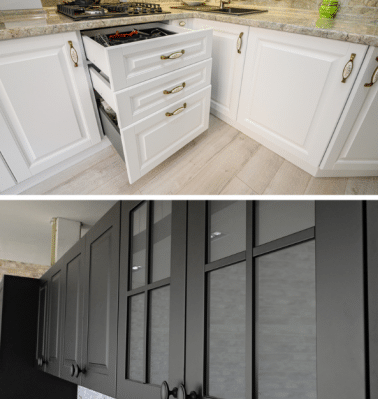
Typically, you are only refinishing the exterior and perimeter of a drawer. This means that you should mask off the rest of the drawer with masking tape and plastic to protect it from splatters and over paint/spray.
The cabinet doors are a little more complicated, as both sides need to be painted or stained. A great trick is to use screw-in hooks and coat hangers to hang the doors on to apply your coating. The hooks can be screwed into the bottom or top of the doors, just make sure that you do the least visible side (bottom for bottom cabinet doors, top for top). Once you have your hooks, you can hang the doors from a coat hanger.
The cabinet frames will need all of the same work as the doors and drawers, so make sure you prep the area accordingly.
When it comes to the project itself, the quality of the outcome is determined by the amount of preparation done. This is true of all paint projects, but there are additional facets and, therefore costs, to take into consideration when completing a cabinet project.
Many people think that you can just apply paint over the existing coating on your cabinets, with little to no prep, but this is a mistake you don’t want to make. Proper preparation makes a huge, noticeable difference in the outcome of your project. The first step is to sand off the existing finish.
If you have opted to re-stain and seal your cabinets, they will need to be completely stripped of the current finish. LIME Painting of Chicago recommends not using chemicals to strip the finish, as they can harm the integrity of the wood. A bit of elbow grease and sandpaper is your best bet for removing the existing finish. Re-staining requires you take it down to bare wood, without any trace of the previous coating.
Thoroughly sanding will be needed if there is years of paint build-up on the cabinets and you want a smooth, new look. You can sand away any imperfections in the current finish from paint chipping off, as well as minor dings and scratches. Modern paint is self-leveling but it will not fill in a chipped area.
If your cabinets are in good shape, a light scuff with 150 grit sandpaper will provide adequate preparation for the next coat.
Don’t put the sandpaper away after this step, a light scuff with 200+ grit sandpaper should be done between each coat of paint, stain, or sealer.
There is no need to use a primer if you are going to stain your cabinets. So skip this step!
However, if you are going to paint, best practice is to use a primer. There are multiple reasons for priming, and these will help dictate which primer to use:
The primer can be brushed and/or rolled on as this will not be the final coat. In addition, you are going to scuff the doors and drawers again which will smooth out any texture caused by the brush or roller.
Stain is best applied with a lint-free rag. This will prevent brush strokes from showing on the wood and helps work the stain into the grain of the wood more evenly. Apply a consistent amount across all surfaces and let it dry the recommended time. If the color is not quite what you imagined, you can always do a second coat to deepen the color.
LIME Painting always recommends a spray finish for cabinets. Spraying provides an extremely smooth finish, just like they were when you bought them! You will be grateful for the setup time you spent earlier when it comes to spraying as your overspray concerns are lessened, and you don’t have to wait for one side of the doors to dry before doing the second.
Spraying also allows you to overlap and achieve the mil thickness of multiple coats in a single coat. So if the coverage is complete after a single coat, you are almost done! All you need to do is wait for the product to fully dry, reinstall the hardware, and install the doors and drawers.
Remember how we were able to skip the priming step with stain? Well this is where the workload balances out, as you need to apply a sealer over the stain. Stain itself does not protect the wood, which is why a sealer is needed to keep that finish beautiful for years to come. Sealers come in both water- and oil based for interior and all of the standard paint sheens.
Many sealers state that they should be applied with a brush. You can always do a light scuff with your 200+ grit sandpaper, apply a second coat, and then scuff again to ensure your wood is both sealed and your finish is silky smooth. Wait for the sealer to dry, reinstall the hardware, and install the doors and drawers.
Your new kitchen has arrived!
Restaining or repainting your cabinets is a great, cost effective way to freshen up your kitchen and get the new look you’ve been dreaming of for so long. If you haven’t been able to find the time to get to your project, consider hiring someone to do it for you.
LIME Painting of Chicago are experts when it comes to refinishing cabinets. We will come to you and take a look at your project, listen to your ideas and provide you with a free estimate. If you need help solidifying your vision, we can connect you with a color consultant to provide expert advice.
Together we will turn your dream into a reality. Contact LIME Painting of Chicago for a free estimate today.